Peace of Mind Devices
Index Uses of trackers Plant-Hire & Agricultural
Plant-Hire/Agri
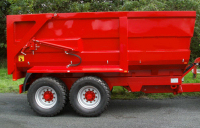
Benefits of GPS trackers on Plant items:
GPS trackers in Plant items provide information on their locations, whether/when they move if they're not supposed to, or if they enter & return to a designated location. Alert options inform those with responsibility about potential thefts or mis-use. It can also provide potentially valuable information in its History page about when it starts and stops moving on site each day. It can also provide information on such as whether hire conditions are breached, or whether equipment is "off hire".
Motion and zone alerts can be delivered by SMS (text) message or by email to up to 3 recipients. Obviously trackers need to be on, charged and suitably located within an asset. We provide multiple (7 presently) user interfaces to provide access and control of the tracker and its alert conditions using any type of internet device. Trackers are essentially "peace of mind" machines, whether wired-in or independently powered.

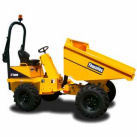
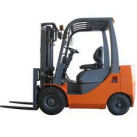
Post-theft recovery:
GPS trackers may not prevent loss or theft but should help with the detection of theft, and with recovery. It is obviously important to involve law enforcement agencies (Police/Gardai) in any search and recovery. It is also important to conceal a tracker's location both in where the tracker is located, and where/how it is connected to an electrical system.
Picking a tracker location:
It is obviously important to locate a tracker where it will be hard to find. If a tracker is wired in, there are two locations of concern: 1) where the electrical connections are made; and 2) where the tracker is located.
- Electrical connection location selection
It is best to connect the wiring kit's red (+ve) wire to a cable or connector that is always "on" i.e. not switched by the ignition switch or "kill" switch if there is one. Such a connection location guarantees that the battery in the tracker is continuously being (re-)charged. Frequently it is necessary to cut away a small piece of the outer cable insulation of the red/black battery leads at a location that it not obvious to someone looking for a tracker. Having removed a small section of the thick (usually red) +ve battery lead insulation, we recommend soldering the wiring kit's red lead to the exposed copper(usually), then applying molten plastic from a hot glue gun to restore insulation and also strengthen the attachment between the thin red lead and the strong battery lead. Finally, cover the join/junction with red/coloured PVC tape and a cable tie for wire-tug protection. conceal any surplus cable and any tell-tale signs of connection as much as possible. - CAN BUS voltage considerations
Make sure that the voltage at the connection point is constant, and that it doesn't drop down shortly after connection to a vehicle's CAN BUS (Controller Area Network) control system. The CAN BUS in a vehicle makes multiple use of cables in a vehicle and may change supplied voltages at different times. The CAN BUS is increasingly common in newer vehicles and willl remain so. Locations such as courtesy lights were once reliable sources of power for trackers but not any more, except on older vehicles/ diggers. A telltale sign of this problem is If the flashing (charging) red LED on the tracker stops flashing for no obvious reason, suggesting that the supplied voltage has dropped below the minimum of 8V required by the hard wiring kits we supply. The tracker will also show as not charging in the user interfaces. - Earth connnection
The black (GND) wire can be connected to any suitable clean, rust-free metallic chasis location. Ideally solder/tin the black wire into a loop or crimp on a terminal, before attaching it to a chassis fitting or bolt. If an always on connection is not available, then a switched connection will have to suffice and risk that the tracker's battery will deplete before recharging next occurs.
- Tracker location:
The wiring kit lead is either 1m or 2.5m in length (depending on which purchased) allowing the tracker to be quite removed from the electrical connection. The tracker needs to be set facing as much of the outside world as possible, e.g. the sky or the road. The better the chosen location is, the better the GPS signal strength will be, giving better locational accuracy and better battery life. When mounted, the side of the tracker with the function button has the two internal antennae, and so this side must face the road or the outside world. Locating a tracker behind upholstery panels or plastic panels in a passenger compartment is fine. The front side of the tracker (with LEDs and function button) must face away from metal bulkheads or panels. The location must allow at least some GPS satellite radio signal to get through. It can be partially but not completely surrounded by metal. - If a Prime 1 or 2 tracker is being located in a location where it will get wet or dirty, it is essential to enclose the tracker inside the supplied zip-lock polythene bags included in its box. If wiring it in, attach the USB Mini connector and cable-tie into the tracker's USB port. Then turn off the tracker and place it inside the bag and cable-tie where the cable leaves the zipped bag as tightly as possible to minimise moisture ingress. Then place it inside the zipped pouch provided and arrange its velcro straps around a suitable cable/hose/opening tightly to minimise motion and moisture/dirt ingress into it. Finally after making the electrical connection, the tracker should power on, with a flashing red LED. If it doesn't, there is a connection problem. If it does, put some PVC tape over the LEDs on the pouch's clear window so that it doesn't attract attention. Once again, make sure the side with the function button is facing towards the opening (road/window).
Factors to be considered:
1. If wired-in operate only in Normal mode, never in Battery Save mode. If not wired-in, both modes are available.
2. Power - use an Internal / auxilliary battery or connect to wiring system;
3. Conceal the tracker and its wiring?
4. Need for a hermetic additional enclosure to completely seal the device?
5. Select the appropriate tracker model. Prime devices are only splash-resistant, not water-proof, whereas Bond Trackers are completely hermetic.

In normal mode, the tracker sleeps when not moving to save power, but its modem remains on so it can implement incoming commands immediately. The battery level drops over time depending on how frequently it has to send position reports, the GPS signal strength, and the % of time that it's moving (and not sleeping). When the battery drops below 20% it sends an alert to the Contacts defined in the Admin panel.
Battery Save mode allows the battery in a Prime1 or 2 that is not wired in to last months by completely powering off between (scheduled) position reports (at 30m, 1hr, 2hr, 4hr, 6hr, 12 and 24hr time intervals). This allows the internal battery to last weeks or months between charges, depending on model. Please note that we deliver our devices with the Battery Save mode option turned off and with the panel button to activate hidden. This is so as to prevent new users from getting confused in the early stages because when a tracker is off until its next scheduled wake-up time it can appear to be not working, unless Battery Save mode is understood. Contact us at info@gps2find.com citing the tracker ID number, if you want us to activate this function on your device.
Also, when hibernating, they should be undetectable by a thief using a scanner unless the scan occurs during a scheduled position report, which is unlikely. The inherent disadvantages of this mode of operation are: 1) geo-fence / zone alerts will not occur until the next scheduled wake-up/report time; 2) Motion detection is limited to detecting motion only when awake; and 3) Devices are uncontactable until they next wake up, can be upt to 24hrs. The device can be mistakenly be thought to be not working properly.
Multiple asset display:
Multiple trackers can be displayed simultaneously on a map. Each asset can have its own identifying icon and legend, as can be set up in the Tracking Panel's Admin page. If you want multiple devices to go under one or more Account Reference (log-in code) please contact us. If any have a password set, then all must have that password set also. Customers can control log-ins and passwords in the Track Panel's Admin section - see HowTo on this
Registering plant and insurance cost reduction:
GPS2Find have an association with thePlantFiles Ltd (www.thePlantFiles.com) with whom owners of plant items can register and create a folder on each plant item, by uploading photos, serial numbers and any distinguishing attributes to fully identify each plant item. This allows police bodies to easily identify recovered items and establish ownership in a timely manner. By providing this information plant owners get a reduction in insurance costs based on the quality of information that they provide, and the insurance broker/company that they deal with. Having one of our GPS tracker fitted can result in a further reduction in premiums or excesses. Establishing a fact-filled portfolio on each asset complements the function of a tracker, especially if it has been removed or disabled. It should still make stolen equipment hard to resell. If interested, ring and check with your insurance broker or contact Eamonn at thePlantFiles +353(0)87 917 2221. ![]()


